Samstag, 31. Dezember 2016
Montag, 26. Dezember 2016
Developer Diary - The Creation of a 3DS/Switch Game
Today we at Planet3DS are starting a new series to bring in some variety - a developer diary. I recently acquired the rank of a Nintendo developer and started making a game that I would like to publish for Nintendo's new home console, Switch and maybe also for the 3DS.
Developer Diary - The Creation of a 3DS/Switch Game
Entwicklertagebuch - Der Weg zum eigenen 3DS/Switch-Spiel
Heute starten wir auf Planet3DS eine neue Rubrik, die für etwas Abwechslung sorgen dürfte - ein Entwicklungstagebuch zu einem Spiel. Ich habe seit kurzem einen Nintendo-Entwickler-Rang und damit begonnen, ein Spiel zu entwickeln, welches ich für Nintendos neue Heimkonsole Nintendo Switch und vielleicht für den 3DS veröffentlichen möchte.
Entwicklertagebuch - Der Weg zum eigenen 3DS/Switch-Spiel
Spiele-Highlights für 2017
Zum Jahresabschluss gibt es einen kleinen Ausblick auf die Spiele-Highlights für 2017 auf Planet3DS.de mit Beitrag zu Pikmin für den 3DS von mir:
Kolumne: 4. Advent: Highlights für 2017
Montag, 12. Dezember 2016
Wunderbare Winterlevel in Videospielen
Schönen 3. Advent mit wunderbaren Winterlevel in Videospielen auf Planet3DS.de mit einem Part zu Terraria von mir:
3. Advent: Wunderbare Winterlevel in Videospielen
Montag, 5. Dezember 2016
Couch-Koop unterm Weihnachtsbaum
Frohen 2. Advent, mit Couch-Koop unterm Weihnachtsbaum auf Planet3DS.de,
mit einem Beitrag zu Super Mario 3D World von mir:
mit einem Beitrag zu Super Mario 3D World von mir:
Sonntag, 27. November 2016
Spiele mit bewegenden Storys
Pünktlich zum ersten Advent gibt es auf Planet3DS.de eine Kolumne zum Thema Emotionen in Videospielen, an dem ich mitwirken durfte:
Mittwoch, 16. November 2016
Japan Journey 2016
In September, I spent three weeks in Japan on holiday with my best buddy.
Started in Fukuoka, with stops in Ōsaka and Kyōto to Tōkyō.
We took a lot of pictures and put a few of them in a presentation that I would like to show you here:
Started in Fukuoka, with stops in Ōsaka and Kyōto to Tōkyō.
We took a lot of pictures and put a few of them in a presentation that I would like to show you here:
Labels:
akihabara,
aquarium,
dazaifu,
englisch,
english,
fukuoka,
holiday,
japan,
journey,
kyoto,
odaiba,
osaka,
pictures,
presentation,
slide show,
tokyo,
tokyo game show,
trip,
ultra japan
Japan Urlaub 2016
Im September war ich mit meinem besten Kumpel drei Wochen in Japan im Urlaub.
Begonnen in Fukuoka, über Ōsaka und Kyōto bis nach Tōkyō.
Wir haben viele Bilder gemacht und ein paar davon habe ich in eine Präsentation gesteckt, die ich euch hier zeigen möchte:
Begonnen in Fukuoka, über Ōsaka und Kyōto bis nach Tōkyō.
Wir haben viele Bilder gemacht und ein paar davon habe ich in eine Präsentation gesteckt, die ich euch hier zeigen möchte:
Labels:
akihabara,
aquarium,
ausflug,
bilder,
dazaifu,
deutsch,
fotos,
fukuoka,
german,
japan,
kyoto,
odaiba,
osaka,
präsentation,
reise,
slide show,
tokio,
tokyo game show,
ultra japan,
urlaub
Dienstag, 8. November 2016
Review: Fairune 2
Klassisches Zelda-Rätseln und Gegner einfach überrennen?
Mein Kurztest zu Fairune 2 für den 3DS ist online auf Planet3DS
[Liste aller meiner Artikel für Planet3DS.de]Redakteur bei Planet3DS
Ich habe es hier noch gar nicht verraten - ich bin seit ein paar Monaten ehrenamtlich als Redakteur für Planet3DS tätig. Planet3DS ist ein inoffizielles online Magazin für den Nintendo 3DS.
Hier habe ich die Ehre ab und zu Artikel und Kurztests zu Spielen veröffentlichen zu dürfen, oder sogar ein Messetagebuch zur Tokyo Game Show von meinem Japan-Besuch letzten September:
Ein Beispiel für einen aktuellen Spieletest ist:
Oder eine aktuelle Kolumne zum Anlass von Halloween:
Kolumne: Schlimmer geht immer - Dystopische Videospielwelten
Auf meiner Homepage findet ihr die Liste von Artikeln von mir, oder bei denen ich mitgewirkt habe:
Meine Artikel für Planet3DS.de
Editor for Planet3DS
I have not yet revealed it here - I've been working as an editor for Planet3DS for a few months now. Planet3DS is an unofficial online magazine for the Nintendo 3DS.
Here I have the honor to publish articles and short reviews from time to time, or even a diary of the Tokyo Game Show of my visit to Japan last September:
An example of a current game review:
Or a current column on the occasion of Halloween:
Kolumne: Schlimmer geht immer - Dystopische Videospielwelten
On my homepage you will find the list of articles by me or in that I contributed:
Meine Artikel für Planet3DS.de
Mittwoch, 3. August 2016
Knufftris
Knufftris - my fluffy puzzle game for iOS and Androidis available now!
Do you remember it, as I've shown how to develop your own Tetris game with GameMaker? At that time I promised that I will develop this game further - and so it was.
Today's post is to introduce you to the end result:
Knufftris
A fluffy game... just like Tetris, but cute.
Arrange the falling Knuffs of various forms so that lines get filled. Completed lines dissolve and give points.
The more Knuffs are cleared at once, the more points you get. But be careful, with the time the speed at which the Knuffs fall is getting higher and you have to prevent the game area to overflow!
Choose from ten different starting speeds and four different game area sizes and beat your and your friends highscore! Can you unlock all the achievements?
Swipe your finger across the screen to move the Knuffs. Alternatively, you can use a gamepad that is compatible with your device.
I would be happy about feedback and support
in the form of reviews and sharing the game!
Have fun and see you next time.
Find the game in Apple App Store and in Google Play Store!
Here you can find the free full version:in the form of reviews and sharing the game!
Have fun and see you next time.
Knufftris
Mein neues Spiel Knufftris ist für iOS und Android erschienen - ein knuffiges Tetris Spiel.
Erinnert ihr euch noch daran, wie ich eich gezeigt habe wie man sein eigenes Tetris Spiel mit dem GameMaker entwickelt? Damals habe ich versprochen, dass ich dieses Spiel noch weiter entwickeln werde - und so war es dann auch.
Der heutige Post soll euch das Endergebnis vorstellen:
Knufftris
Ein knuffiges Spiel... wie Tetris, aber in süß.
Ordne die herunterfallenden Knuffs verschiedener Formen so an, dass sich gefüllte Zeilen ergeben. Komplette Zeilen lösen sich auf und geben Punkte.
Je mehr Knuffs auf einmal aufgelöst werden, um so mehr Punkte gibt es. Aber Vorsicht, mit der Zeit wird die Geschwindigkeit, mit der die Knuffs herunter fallen immer größer und das Spielfeld darf nicht überlaufen!
Wähle zwischen zehn verschiedenen Startgeschwindigkeiten und vier verschiedenen Spielfeldgrößen und überbiete deinen Highscore und den deiner Freunde! Kannst du alle Errungenschaften freispielen?
Wische mit deinen Fingern über den Bildschirm um die Knuffs zu bewegen. Alternativ kannst du auch ein Gamepad verwenden, welches mit deinem Gerät kompatibel ist.
Finde das Spiel im Apple App Store und im Google Play Store!
Hier könnt ihr die kostenlose Vollversion finden:
Ich würde mich über Feedback und Unterstützung
in Form von Bewertungen und Verbreitung sehr freuen!
in Form von Bewertungen und Verbreitung sehr freuen!
Viel Spaß und bis zum nächsten Mal.
Donnerstag, 2. Juni 2016
Erstellen einer eigenen VR-Welt welche in Browsern auf allen Plattformen läuft
Lange nicht gesehen! Sorry, ich bin sehr beschäftigt ...
Heute möchte ich euch zeigen, wie man ganz einfach eine eigene VR-Erfahrung mit dem WebVR Boilerplate erstellt:
Dieser Screenshot wurde in Chrome (Version 50.0.2661.102 m) ohne den VR-Modus gemacht.
Ihr könnt es selbst auf http://badtoxic.de/webvr begutachten.
Wenn euer Browser mit dem VR-Modus kompatibel ist, seht ihr einen kleinen Cardboard-Button in der rechten unteren Ecke. Ich habe den VR-Modus mit Android, iOS (Safari auf dem iPhone 6+, iOS 9.3.2) und einem speziellem Chromium-Build auf meinem PC mit einer HTC Vive getestet. Ihr könnt auch eine Firefox Nightly Version mit dem Oculus Rift Enabler verwenden.
Für weitere Infos könnt ihr webvr.info besuchen.
Los geht's
1. Zuerst solltet ihr Boris’ WebVR Boilerplate repo klonen oder herunterladen
2. Dies könnt ihr dann auf euren Webserver hochladen oder einen lokalen starten, genauso, wie ihr es für jede andere Web-Anwendung tun würdet
Um zu testen, ob der Server läuft, öffnet localhost auf dem Port, mit dem der Server spricht. (Standard: http://localhost:8000)
Alternativ könnt ihr einen Dropbox Public-Ordner verwenden, wenn ihr einen habt, wie ich es hier gemacht habe:
Web VR BadToxic Beispiel auf Dropbox
Ihr solltet nun die Standard-Boilerplate-Szene, mit einem sich drehenden Würfel vor einem schwarzen Hintergrund mit grünen Rasterlinien sehen.
Glückwunsch! Ihr habt eure erste VR-Web-App erstellt.
3. Nun lasst uns beginnen, indem wir die Szene modifizieren - wir ersetzen das Hintergrund-Gitter mit einer Skybox-Kugel.
Als erstes lasst uns alles entfernen, was mit dem Laden der Hintergrundtextur img/box.png und der alten skybox zu tun hat. Stattdessen laden wir eine andere Textur, die wir im img-Ordner abgelegt haben - zum Beispiel ein skybox.png, welches wir vielleicht durch eine Suche nach "skybox" mit Google gefunden haben... Aber denkt stets daran, dass Texturen immer Größen von 2er-Potenzen haben müssen, wie etwa 1024x512. Ich habe dieses Bild gefunden:
Fertig!
Also - das sollte für unser kleines Tutorial ausreichen. Unser Code resultiert nun in folgende Szene.
Dieses Mal habe ich den erwähnten Chromium-Build verwendet und den VR-Modus gestartet. Deshalb sehen wir zwei Bilder - eines für jedes Auge.
Wenn ihr Fragen oder Anregungen habt, fühlt euch frei unten die Kommentar-Funktion zu nutzen.
Und wenn ihr das komplette Projekt anschauen wollt, können ihr mich auf GitHub besuchen unter:
Vielen Dank für's Lesen - man sieht sich!
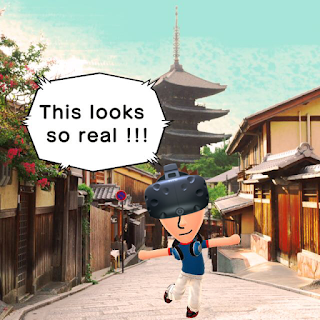
Übrigens, auch mein Mii mag VR!
Quellen:
WebVR
WebVR Boilerplate
Responsive WebVR
4 Steps to Start Experimenting with WebVR in 10 Minutes
Siehe auch:
MOZVR
WebVR Samples
Heute möchte ich euch zeigen, wie man ganz einfach eine eigene VR-Erfahrung mit dem WebVR Boilerplate erstellt:
Ein THREE.js-basierter Ausgangspunkt für VR Erfahrungen, welcher sowohl Google-Cardboards als auch andere VR-Headsets unterstützt. Außerdem wird ein Fallback angeboten, der das Erleben des gleichen Inhalts erlaubt, ohne dass eine VR-Vorrichtung erforderlich ist.Das Ergebnis am Ende wird wie folgt aussehen:
Dieser Screenshot wurde in Chrome (Version 50.0.2661.102 m) ohne den VR-Modus gemacht.
Ihr könnt es selbst auf http://badtoxic.de/webvr begutachten.
Wenn euer Browser mit dem VR-Modus kompatibel ist, seht ihr einen kleinen Cardboard-Button in der rechten unteren Ecke. Ich habe den VR-Modus mit Android, iOS (Safari auf dem iPhone 6+, iOS 9.3.2) und einem speziellem Chromium-Build auf meinem PC mit einer HTC Vive getestet. Ihr könnt auch eine Firefox Nightly Version mit dem Oculus Rift Enabler verwenden.
Für weitere Infos könnt ihr webvr.info besuchen.
Los geht's
1. Zuerst solltet ihr Boris’ WebVR Boilerplate repo klonen oder herunterladen
git clone https://github.com/borismus/webvr-boilerplate.git
2. Dies könnt ihr dann auf euren Webserver hochladen oder einen lokalen starten, genauso, wie ihr es für jede andere Web-Anwendung tun würdet
cd webvr-boilerplate/
python -m SimpleHTTPServer 8000
Um zu testen, ob der Server läuft, öffnet localhost auf dem Port, mit dem der Server spricht. (Standard: http://localhost:8000)
Alternativ könnt ihr einen Dropbox Public-Ordner verwenden, wenn ihr einen habt, wie ich es hier gemacht habe:
Web VR BadToxic Beispiel auf Dropbox
Ihr solltet nun die Standard-Boilerplate-Szene, mit einem sich drehenden Würfel vor einem schwarzen Hintergrund mit grünen Rasterlinien sehen.
Glückwunsch! Ihr habt eure erste VR-Web-App erstellt.
3. Nun lasst uns beginnen, indem wir die Szene modifizieren - wir ersetzen das Hintergrund-Gitter mit einer Skybox-Kugel.
Als erstes lasst uns alles entfernen, was mit dem Laden der Hintergrundtextur img/box.png und der alten skybox zu tun hat. Stattdessen laden wir eine andere Textur, die wir im img-Ordner abgelegt haben - zum Beispiel ein skybox.png, welches wir vielleicht durch eine Suche nach "skybox" mit Google gefunden haben... Aber denkt stets daran, dass Texturen immer Größen von 2er-Potenzen haben müssen, wie etwa 1024x512. Ich habe dieses Bild gefunden:
Und so kann unser Code wie folgt aussehen:
var textureLoader = new THREE.TextureLoader();
var skybox;
textureLoader.load('img/skybox.png', function (skyboxTexture) {
  var skyboxMaterial = new THREE.MeshBasicMaterial();
  skyboxMaterial.map = skyboxTexture;
  skyboxMaterial.side = THREE.BackSide;

  // Create the mesh based on geometry and material
  var skyboxSphereGeometry = new THREE.SphereGeometry(50, 200, 200);
  var skyboxmesh = new THREE.Mesh(skyboxSphereGeometry, skyboxMaterial);
  skybox = new THREE.Mesh(skyboxSphereGeometry, skyboxMaterial);
  scene.add(skybox);
};
Hier haben wir einen Textur-Loader erstellt und rufen seine Funktion load auf, um unser neues Bild zu laden. Die Funktion benötigt auch eine weitere Funktion, die aufgerufen wird, wenn das Laden der Textur abgeschlossen wurde. Wenn diese asynchrone Funktion aufgerufen wird, wird das Skybox-Material mit der geladenen Textur erstellen und die Skybox instanziiert, welche wir dann zu unserer Szene hinzufügen.
4. Danach können wir unserem Würfel eine ausgefallene Textur hinzufügen. Also laden wir einfach eine andere Textur wie im vorherigen Schritt und binden diese an den Würfel.
So habe ich den folgenden Code direkt nach dem scene.add(skybox); des letzten Code-Ausschnitts hinzugefügt (in unserer asynchronen Funktion der Skybox).
textureLoader.load('img/toxicon_logo.png', function (toxiconLogoTexture) {
  var toxiconCubeGeometry = new THREE.BoxGeometry(0.5, 0.5, 0.5);
  var toxiconCubeMaterial = new THREE.MeshBasicMaterial();
  toxiconCubeMaterial.map = toxiconLogoTexture;
  toxiconCube = new THREE.Mesh(toxiconCubeGeometry, toxiconCubeMaterial);

  // Position cube mesh to be right in front of you.
  toxiconCube.position.set(0, controls.userHeight, -1);

  // Add cube mesh to your three.js scene
  scene.add(toxiconCube);

  // For high end VR devices like Vive and Oculus, take into account the stage
  // parameters provided.
  setupStage();
});
Fertig!
Also - das sollte für unser kleines Tutorial ausreichen. Unser Code resultiert nun in folgende Szene.
Dieses Mal habe ich den erwähnten Chromium-Build verwendet und den VR-Modus gestartet. Deshalb sehen wir zwei Bilder - eines für jedes Auge.
Wenn ihr Fragen oder Anregungen habt, fühlt euch frei unten die Kommentar-Funktion zu nutzen.
Und wenn ihr das komplette Projekt anschauen wollt, können ihr mich auf GitHub besuchen unter:
Vielen Dank für's Lesen - man sieht sich!
Übrigens, auch mein Mii mag VR!
Quellen:
WebVR
WebVR Boilerplate
Responsive WebVR
4 Steps to Start Experimenting with WebVR in 10 Minutes
Siehe auch:
MOZVR
WebVR Samples
Mittwoch, 1. Juni 2016
Creating your own VR world running in browsers on all platforms
Long time no see! Sorry, I'm very busy...
Today I want to show you, how you can easily create your own VR experience using WebVR Boilerplate:
This screenshot was taken in Chrome (Version 50.0.2661.102 m) without the VR mode enabled.
You can check it out yourself by visiting http://badtoxic.de/webvr.
If your browser is compatible to the VR mode you will see a little cardboard button on the bottom right. I testet the VR mode with Android, iOS (Safari on iPhone 6+, iOS 9.3.2) and a special chromium build on my pc with a HTC Vive. You also can use Firefox Nightly with an Oculus Rift enabler installed.
For more info visit webvr.info.
Getting started
1. At first you should clone or download Boris’ WebVR Boilerplate repo
2. Then you can upload this to your web server or start a local one, similar to way you’d have to spin up a server for any regular web app like
To test that your server is running, open up localhost on the port that your server is talking to. (Default: http://localhost:8000)
Alternatively you can use a Dropbox Public folder, if you have one, like I did here:
Web VR BadToxic example on Dropbox
You should now see the default boilerplate scene, with a spinning cube against a black background with green gridlines.
Congratulations! You just deployed your first VR web app.
3. Now let us start modifying the scene by replacing the background grid with a skybox sphere.
So first remove everything that has to do with loading the background texture img/box.png and the skybox. Instead we load another texture we placed in the img folder - for example a skybox.png we may have found via google by searching "skybox"... But remember that textures always have to have any power of 2 size like 1024x512. So I just found this image:
Finished!
So - this may be enough for our little tutorial. Our code now results in the following scene.
This time I used the mentioned chromium build and startet the VR mode. That's why we see two views - one for each eye.
If you have any questions or suggestions, feel free to use the comment function below.
And if you want to check out the complete project you can visit me on GitHub:
Thank you for reading and see you later!
BTW, also my Mii likes VR!
Sources:
WebVR
WebVR Boilerplate
Responsive WebVR
4 Steps to Start Experimenting with WebVR in 10 Minutes
See also:
MOZVR
WebVR Samples
Today I want to show you, how you can easily create your own VR experience using WebVR Boilerplate:
A THREE.js-based starting point for VR experiences that work well in both Google Cardboard and other VR headsets. Also provides a fallback for experiencing the same content without requiring a VR device.The result will look like this in the end:
This screenshot was taken in Chrome (Version 50.0.2661.102 m) without the VR mode enabled.
You can check it out yourself by visiting http://badtoxic.de/webvr.
If your browser is compatible to the VR mode you will see a little cardboard button on the bottom right. I testet the VR mode with Android, iOS (Safari on iPhone 6+, iOS 9.3.2) and a special chromium build on my pc with a HTC Vive. You also can use Firefox Nightly with an Oculus Rift enabler installed.
For more info visit webvr.info.
Getting started
1. At first you should clone or download Boris’ WebVR Boilerplate repo
git clone https://github.com/borismus/webvr-boilerplate.git
2. Then you can upload this to your web server or start a local one, similar to way you’d have to spin up a server for any regular web app like
cd webvr-boilerplate/
python -m SimpleHTTPServer 8000
To test that your server is running, open up localhost on the port that your server is talking to. (Default: http://localhost:8000)
Alternatively you can use a Dropbox Public folder, if you have one, like I did here:
Web VR BadToxic example on Dropbox
You should now see the default boilerplate scene, with a spinning cube against a black background with green gridlines.
Congratulations! You just deployed your first VR web app.
3. Now let us start modifying the scene by replacing the background grid with a skybox sphere.
So first remove everything that has to do with loading the background texture img/box.png and the skybox. Instead we load another texture we placed in the img folder - for example a skybox.png we may have found via google by searching "skybox"... But remember that textures always have to have any power of 2 size like 1024x512. So I just found this image:
And so our code may look like the following:
var textureLoader = new THREE.TextureLoader();
var skybox;
textureLoader.load('img/skybox.png', function (skyboxTexture) {
  var skyboxMaterial = new THREE.MeshBasicMaterial();
  skyboxMaterial.map = skyboxTexture;
  skyboxMaterial.side = THREE.BackSide;

  // Create the mesh based on geometry and material
  var skyboxSphereGeometry = new THREE.SphereGeometry(50, 200, 200);
  var skyboxmesh = new THREE.Mesh(skyboxSphereGeometry, skyboxMaterial);
  skybox = new THREE.Mesh(skyboxSphereGeometry, skyboxMaterial);
  scene.add(skybox);
};
Here we created a texture loader and call its function load for our new image. The function also need a further function that will be called when loading the texture has finished. When this asynchronous function is called, it will create the skybox material with the loaded texture and instanciate the skybox we then add to our scene.
4. After that we may want to add some fancy texture to our cube. So we just do load another texture like in the previous step and bind it to the cube.
So I added the following code just after the scene.add(skybox); of the last one (inside our asynchronous function of the skybox).
textureLoader.load('img/toxicon_logo.png', function (toxiconLogoTexture) {
  var toxiconCubeGeometry = new THREE.BoxGeometry(0.5, 0.5, 0.5);
  var toxiconCubeMaterial = new THREE.MeshBasicMaterial();
  toxiconCubeMaterial.map = toxiconLogoTexture;
  toxiconCube = new THREE.Mesh(toxiconCubeGeometry, toxiconCubeMaterial);

  // Position cube mesh to be right in front of you.
  toxiconCube.position.set(0, controls.userHeight, -1);

  // Add cube mesh to your three.js scene
  scene.add(toxiconCube);

  // For high end VR devices like Vive and Oculus, take into account the stage
  // parameters provided.
  setupStage();
});
Finished!
So - this may be enough for our little tutorial. Our code now results in the following scene.
This time I used the mentioned chromium build and startet the VR mode. That's why we see two views - one for each eye.
If you have any questions or suggestions, feel free to use the comment function below.
And if you want to check out the complete project you can visit me on GitHub:
Thank you for reading and see you later!
BTW, also my Mii likes VR!
Sources:
WebVR
WebVR Boilerplate
Responsive WebVR
4 Steps to Start Experimenting with WebVR in 10 Minutes
See also:
MOZVR
WebVR Samples
Donnerstag, 7. Januar 2016
Create games for Nintendo's New 3DS Browser (HTML5) with GameMaker
Hi Guys,
this time I deald with trying to get a game running in the browser on the N3DS, which was written with the GameMaker.
The Nintendo New 3DS is Nintendo's current handheld, which is able to display on its upper screen 3-dimensional images without glasses and has a lower touchscreen.
I'm going to share my findings with you here so that you can get games running on the N3DS, too.
My first step:
I want to find out at runtime whether the game is currently running on a N3DS, so that the game can adapt to this situation.
I have written a small HTML5 application with GameMaker that displays some information about the device / program / browser, on / in which it is running. I've adjusted the resolution of this application to the 3DS touch screen size. The device has a resolution of 2 × 400 × 240 px, ie 400 × 240 px for each eye.
Just open the following address on your N3DS to see the information:
badtoxic.de/deviceTest
This information shall include the following:
1. As OS iOS is detected!
2. There is exactly one gamepad identified with the description"New Nintendo 3DS Controller".
(Done with GameMaker: Studio in version 1.4.1657)
So I wrote a script that determines whether it is a 3DS:
It should be self-explanatory in this context for people being familiar with the GameMaker scripting language or general programming.
On the screenshot you can see the result in the OS tab - it works.
IMPORTANT (for GameMaker users):
The gamepad is not available in the first step!
It's best to use an alarm [0] = 2 event, or something like that, to this test a little bit later.
And no - the async system event is not triggered, which can tell you about a gamepad just plugged in.
Then I also experimented with a game of mine on the N3DS, which I had already written for a browser. It seemed to me as would ten small scaled sprites slow down the game too much. So I would first start with only a few unscaled sprites or even geometric shapes only, then it might work well.
In the mentioned game it didn't help to remove all unnecessary things like particles or graphics... The basic elements were already too complex.
However, I think I will program something without GameMaker natively for the 3DS in C first - I already did a little Hello World program and I was able to run it on my device. ;) Maybe I'll tell you more about this here later.
Other important findings for the HTML5 variant:
- Only the touch screen is usable.
- You can also control with touch.
But this unfortunately also brings up the lower browser bar - uncool!
- By pressing "digital down" once you get a fullscreen.
- The digital pad then is freely usable according to other gamepads.
- The A button can be used in the game.
All other buttons trigger a function in the browser.
(I have not yet explored as what button the A button is recognized, but I guess it's the start button.)
Do you now want to try it yourself?
Have fun and good luck!
See also:
Informationen zum Browser des Nintendo 3DS
Spezifikation von Nintendos altem 3DS Internetbrowser
this time I deald with trying to get a game running in the browser on the N3DS, which was written with the GameMaker.
The Nintendo New 3DS is Nintendo's current handheld, which is able to display on its upper screen 3-dimensional images without glasses and has a lower touchscreen.
I'm going to share my findings with you here so that you can get games running on the N3DS, too.
My first step:
I want to find out at runtime whether the game is currently running on a N3DS, so that the game can adapt to this situation.
I have written a small HTML5 application with GameMaker that displays some information about the device / program / browser, on / in which it is running. I've adjusted the resolution of this application to the 3DS touch screen size. The device has a resolution of 2 × 400 × 240 px, ie 400 × 240 px for each eye.
Just open the following address on your N3DS to see the information:
badtoxic.de/deviceTest
This information shall include the following:
1. As OS iOS is detected!
2. There is exactly one gamepad identified with the description"New Nintendo 3DS Controller".
(Done with GameMaker: Studio in version 1.4.1657)
This is what my little test application displays
So I wrote a script that determines whether it is a 3DS:
1:  /// check_gamepad_for_3ds();
2:  // This script checks if there is exactly one gamepad that is named
3:  // "(New) Nintendo 3DS Controller", like it's the case when the game was launched in the (New) Nintendo 3DS Browser.
4:  // This script will also support detecting the old 3DS, even while its Browser doesn't support HTML5 (yet).
5:  // Returns true if it's any kind of Nintendo 3DS.
6:  // by BadToxic
7:  global.is_3ds = false; // Is any kind of 3DS
8:  global.is_o3ds = false; // Is the old 3DS model (also 2DS)
9:  global.is_n3ds = false; // Is the new 3DS model
10:  if (gamepad_is_supported()) {
11:    if (gamepad_get_device_count() == 1) {
12:      if (gamepad_is_connected(0)) {
13:
14:        var gamepad_description = gamepad_get_description(0);
15:
16:        global.is_o3ds = gamepad_description == "Nintendo 3DS Controller";
17:        global.is_n3ds = gamepad_description == "New Nintendo 3DS Controller";
18:        global.is_3ds = global.is_o3ds || global.is_n3ds;
19:      }
20:    }
21:  }
22:  return global.is_3ds;
It should be self-explanatory in this context for people being familiar with the GameMaker scripting language or general programming.
On the screenshot you can see the result in the OS tab - it works.
IMPORTANT (for GameMaker users):
The gamepad is not available in the first step!
It's best to use an alarm [0] = 2 event, or something like that, to this test a little bit later.
And no - the async system event is not triggered, which can tell you about a gamepad just plugged in.
Then I also experimented with a game of mine on the N3DS, which I had already written for a browser. It seemed to me as would ten small scaled sprites slow down the game too much. So I would first start with only a few unscaled sprites or even geometric shapes only, then it might work well.
In the mentioned game it didn't help to remove all unnecessary things like particles or graphics... The basic elements were already too complex.
However, I think I will program something without GameMaker natively for the 3DS in C first - I already did a little Hello World program and I was able to run it on my device. ;) Maybe I'll tell you more about this here later.
Other important findings for the HTML5 variant:
- Only the touch screen is usable.
- You can also control with touch.
But this unfortunately also brings up the lower browser bar - uncool!
- By pressing "digital down" once you get a fullscreen.
- The digital pad then is freely usable according to other gamepads.
- The A button can be used in the game.
All other buttons trigger a function in the browser.
(I have not yet explored as what button the A button is recognized, but I guess it's the start button.)
Do you now want to try it yourself?
Have fun and good luck!
See also:
Informationen zum Browser des Nintendo 3DS
Spezifikation von Nintendos altem 3DS Internetbrowser
Abonnieren
Posts (Atom)

